Control non-dimmable lights
AAAeCommerce Inc Collaborator
Control any on/off circuit within the load limit (500W for the L82, 3500W for the L83). This means the non dimmable lights you have can be controlled.
Until now all lighting in use with Smart Series dimmers has had to be dimmable. The electronics required to control a non-dimmable LED are quite different to what is inside the Smart Series Dimmers. This may have been an issue for users who may be looking to replace a multi-gang light switch with a Smart Series, 2, 3, or 4 gang dimmer only to find that one of the circuits on that switch is non-dimmable and it’s not exactly easy to change the lamps in use (think LED flood lights, for example). This scenario would have meant the user either having to hope that the non-dimmable circuit can be controlled (sometimes they can behave in a way that’s acceptable, but it’s not a guarantee or something you can easily predict before install) or rejecting the idea altogether.


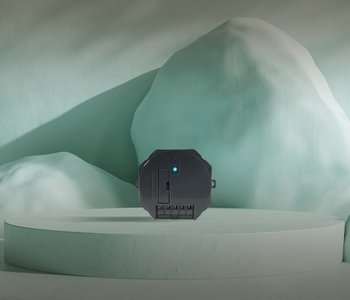
Lightwave has launched the L83 Smart Relay (3-gang) along side the L82 Smart Mini Relay (launched last year). These devices enable you to control any on/off circuit within the load limit (500W for the L82, 3500W for the L83). This means the non dimmable lights you have can be controlled.
‘That’s great, but I wanted to be able to control them from the multi-gang light switch I did previously?’ you may ask. Well, you can.
You may have come across the ‘magic button’ blog on our site, we can use the same logic here to achieve the desired outcome.
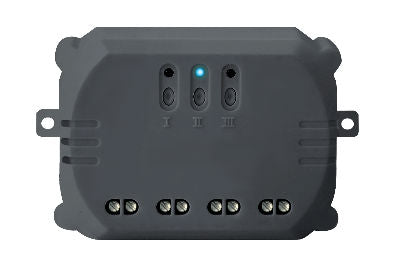
Wire the L82/83 in to the lighting circuit where you can (the relay will need a line and neutral feed and so may be best fitted behind a light fitting)
Be sure not to wire in this terminal
Fit the Smart Series dimmer as you originally intended, but be sure to not wire in the gang for this circuit, you will need to complete the circuit at the switch (a Wago connector will do the job nicely). N.b If you’re not able to fit a neutral to the dimmer then you cannot use the Master-1 gang for this task, it needs a load fitted for the device to calibrate correctly.
Follow the device linking guidance in the manual/app
Once you have the devices linked to the app you’ll need to create an ‘Automation’, click the ‘+’ at the bottom of the app, then ‘Automations’, then choose ‘group’. We’re looking to switch the devices ‘on/off’ together so select ‘Switch’ as the ‘type’. You’ll now need to locate both the relay and the correct gang on the dimmer (we’re now putting your device naming logic to the test!), clicking the desired device tile will turn it orange and display a tick in the top right corner. Now click ‘Next’. Name the automation and click ‘Done’ when you’re happy.
Now let’s try it. Either press one of the buttons on the dimmer or tap either device tile in the app and both the relay and the dimmer will switch together.
Now you can switch a non-dimmable lighting circuit (or any circuit) from the Smart series dimmer. Magic.

When designing your dream home, smart technology is often viewed as aspirational but not always a priority. At Lightwave, we believe that a smart home is something that should augment...
So, you have basic automations set up and you're ready for the next level. We've compiled our Top 10 ideas for advanced automations and routines to help elevate your experience...

Connecting your Lightwave System to your smart speakers is one of the most important parts of setting up your smart home - especially if you want to control your home...
Previously, we’ve explored what a Smart Relay is and how it works, but as the unsung heroes of Smart Home devices, you might be looking for more information on what...